Implement Two-Way Authentication with X.509 Certificates
It's recommended to use two-way authentication (in addition to HTTPS) between the device's Web server and the client accessing it. Authentication is performed and connection to the Web interface is subsequently allowed only if the following conditions are met:
|
■
|
The client possesses a client certificate from a Certification Authority (CA). |
|
■
|
The CA certificate is listed in the device's Trusted Root CA Store. |
Otherwise, the connection is rejected, preventing unauthorized access to the Web management tool.
|
●
|
Implementation of two-way authentication requires a third-party security equipment vendor, CA server, and security administrator personnel. These should create certificates and deploy them to all the computers in the organization. |
|
●
|
The device is supplied with a working TLS configuration consisting of a unique self-signed server certificate. Replace this certificate with one provided by your security administrator. For more information, refer to the User's Manual. |
|
●
|
For management through the device's REST API, secure access can be based on the certificate’s subject name. When a client attempts to connect to the REST interface over TLS, the device checks if the subject name in the client’s certificate matches a TLS subject name configured ('TLS Subject Name') for any user in the Local Users table. If a match is found, the client is automatically authenticated, without needing to provide username or password. The client is granted the user level associated with the matching user in the Local Users table. |
|
➢
|
To configure client-server, two-way authentication using X.509 certificates: |
|
1.
|
Install a client certificate on the management station (your network administrator should provide you with a certificate). |
|
2.
|
Install your organization's CA certificate on the management station. |
|
3.
|
Open the TLS Contexts table (Setup menu > IP Network tab > Security folder > TLS Contexts). |
|
4.
|
In the TLS Contexts table, add a new TLS Context or select the required TLS Context row, and then click the Trusted Root Certificates link located at the bottom of the TLS Contexts page. |
|
5.
|
Click the Import button, select the Root CA certificate file (in base64-encoded PEM format), and then click OK to import the file: |

|
6.
|
Since X.509 certificates have an expiration date and time, the device must be configured to use Network Time Protocol (NTP) to obtain the current date and time. Without the correct date and time, client certificates cannot operate. |
|
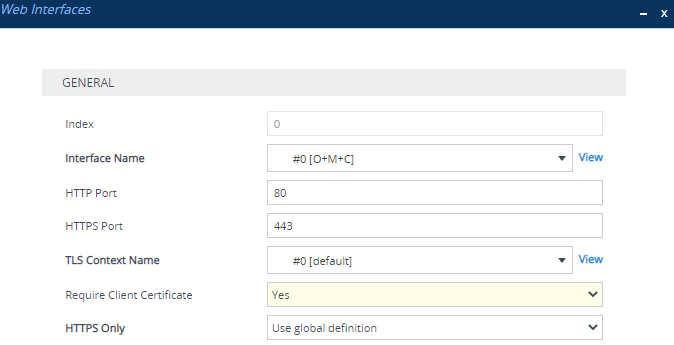
7.
|
Make sure that client certificates for HTTPS connections are required. Open the Web Interfaces table (Setup menu > Administration tab > WEB & CLI folder > Web Interfaces), and then from the 'Require Client Certificate' drop-down list of the OAMP Web interface, select Yes: |